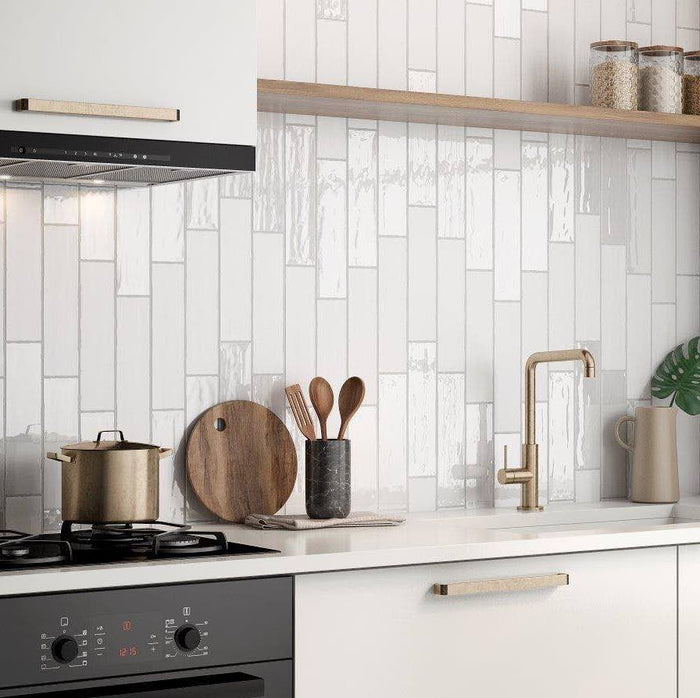
Are you dreaming of a kitchen makeover that combines style and functionality? Installing glass wall tiles might be the perfect solution for you.
With their sleek and modern look, glass tiles can transform your kitchen into a stunning space that reflects your personal taste. Imagine how your kitchen will shine and how impressed your guests will be when they see the sparkling, light-reflecting surfaces.
But how do you go about installing these beautiful tiles yourself? Don’t worry; you don’t need to be a professional. In this guide, you’ll discover simple, step-by-step instructions to help you confidently install glass wall tiles in your kitchen. By the end of this article, you’ll be ready to tackle your project and create a kitchen that you’ll love spending time in. Stay with us, and let’s make your kitchen the heart of your home with a touch of elegance and sophistication.
Preparing The Surface
Preparing the surface is key to a smooth glass wall tile installation. It ensures the tiles stick well and look great for years. Proper preparation avoids common problems like tiles falling off or uneven surfaces.
This stage focuses on cleaning, measuring, and gathering tools. Each step sets the foundation for a successful project.
Cleaning And Smoothing Walls
Start by removing dirt, grease, and dust from the wall. Use warm water and mild soap with a sponge. Rinse well and let the wall dry completely.
Next, smooth out any bumps or holes. Sand rough spots using fine-grit sandpaper. Fill holes with wall filler and let it dry. Sand again for a flat finish. A smooth wall helps tiles stick better and look even.
Measuring And Marking Area
Measure the wall space where tiles will go. Use a tape measure for accuracy. Mark edges lightly with a pencil. Draw horizontal and vertical lines as guides.
Check that your lines are straight using a level tool. Proper measuring prevents uneven tile placement. Marking helps plan tile cuts and layout before sticking tiles.
Gathering Necessary Tools And Materials
Collect all tools before starting. This saves time and prevents interruptions. Essential items include:
- Glass wall tiles
- Tile adhesive or thin-set mortar
- Notched trowel
- Tile spacers
- Grout and grout float
- Measuring tape and pencil
- Level and sponge
- Wall filler and sandpaper
Having everything ready keeps the job organized. It also ensures a smooth workflow while installing glass tiles.
Choosing Glass Wall Tiles
Choosing the right glass wall tiles is a crucial step that sets the tone for your entire kitchen renovation. Your choice affects not only the look but also the feel and durability of your backsplash or accent wall. Before you buy, think about how the tiles will blend with your kitchen’s style and daily use.
Selecting Tile Size And Color
Tile size changes the visual impact significantly. Large tiles create a sleek, modern look and reduce grout lines, making cleaning easier. Smaller tiles add texture and detail but require more upkeep.
Color choice can either brighten your kitchen or create a cozy vibe. Light colors reflect more light, making your space feel larger. Darker hues add depth but can make the area feel smaller. Are you aiming for a bold statement or a subtle backdrop?
Considering Tile Finish And Texture
Glass tiles come in glossy, matte, and textured finishes. Glossy tiles reflect light beautifully, adding brightness and a clean feel. Matte finishes hide fingerprints and smudges better, which is handy in a busy kitchen.
Texture adds another layer of interest. Some tiles have a rippled or patterned surface that can catch the eye. Think about how much maintenance you’re willing to do. Would you prefer something smooth and simple or more tactile and unique?
Ordering Extra Tiles For Backup
Always order more tiles than you think you need—about 10% to 15% extra. This accounts for cuts, breakage, and future repairs. Imagine a tile getting damaged years later and not being able to find an exact match.
Keeping extras on hand saves time and stress later. Store them carefully in a safe, dry place. This small step can make a big difference when maintaining your beautiful kitchen wall.
Setting Up The Workspace
Setting up your workspace is key before installing glass wall tile in your kitchen. A clean, organized area helps the job go smoothly. It keeps your tiles safe and your tools handy. Preparing properly saves time and reduces mistakes.
Protecting Surrounding Areas
Cover countertops and cabinets with plastic sheets or drop cloths. Use painter’s tape to secure the covers in place. Protect floors with cardboard or old blankets. Shield appliances and fixtures from dust and debris. This prevents damage and keeps your kitchen clean.
Organizing Tools And Materials
Gather all necessary tools: tile adhesive, spacers, a tile cutter, and a notched trowel. Place tiles and grout near your workspace for easy access. Arrange tools on a sturdy table or bench. Keep everything within arm’s reach to work efficiently.
Ensuring Proper Lighting
Good lighting helps you see tile edges and spacing clearly. Use bright overhead lights or portable work lamps. Position lights to avoid shadows on the wall. Natural light is helpful but may not be enough. Proper lighting reduces errors and improves tile placement.

Credit: www.mineraltiles.com
Applying Adhesive
Applying adhesive is a key step in installing glass wall tile in your kitchen. It ensures the tiles stick firmly and stay in place for a long time. Proper adhesive application prevents tiles from slipping or falling off.
Take your time with this step. The right technique makes the tile installation smooth and durable. Understanding how to choose and spread adhesive helps create a perfect tile surface.
Choosing The Right Adhesive
Pick an adhesive made for glass tiles. These adhesives are usually white or clear. They help show the tile’s true color. Avoid adhesives that dry yellow or crack over time.
Look for adhesives labeled as “mastic” or “thin-set” for glass tiles. Thin-set is strong and water-resistant. Mastic is easier to use but suits dry areas better.
Spreading Adhesive Evenly
Use a notched trowel to spread adhesive. The notches help control adhesive thickness. Spread a thin, even layer on the wall surface. Avoid thick blobs or bare spots.
Hold the trowel at a 45-degree angle. This helps create uniform ridges. These ridges allow better grip for the tiles. Smooth ridges prevent air pockets behind tiles.
Working In Small Sections
Apply adhesive in small, manageable sections. This keeps adhesive fresh and sticky. Working in large areas can cause adhesive to dry too fast.
Complete one section of tile before moving on. This ensures tiles stick well and align properly. Small sections reduce mistakes and tile slippage.
Installing The Tiles
Installing glass wall tiles in your kitchen can transform the space with a sleek, modern look. The process requires careful attention to detail to ensure the tiles lay flat and align perfectly. Let’s dive into the key steps to get your glass wall tiles installed smoothly and beautifully.
Starting From The Center
Begin by finding the center of your backsplash area. This helps you achieve a balanced layout, preventing awkward cut tiles at the edges. Mark a vertical and horizontal line with a pencil as a guide.
Starting from the center allows you to work outward evenly. It also makes it easier to adjust tiles if you encounter uneven walls. Have you checked if your walls are straight before beginning?
Pressing Tiles Firmly
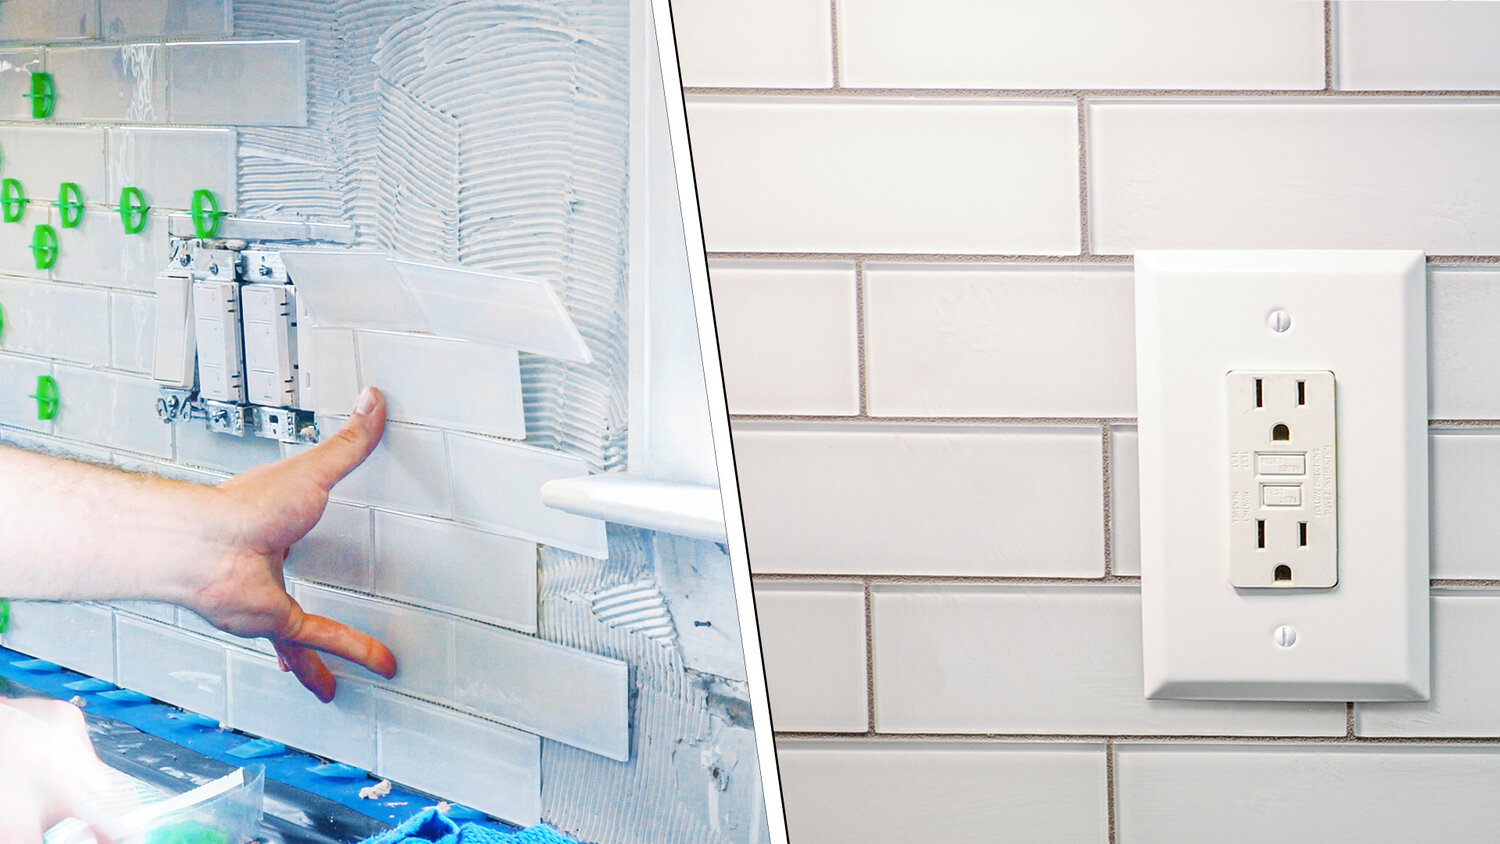
Once you apply the adhesive, press each tile firmly against the wall. This ensures the glue grips the tile and prevents air pockets behind the glass. Use consistent pressure, but avoid pushing too hard to prevent cracking.
Pressing tiles firmly also improves durability. I learned this when a few tiles popped off after drying because they weren’t pressed enough. Remember, a good bond is the backbone of a long-lasting backsplash.
Using Spacers For Even Gaps
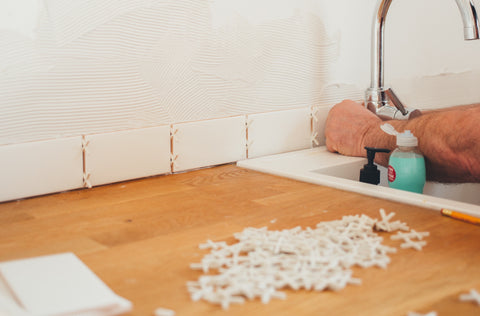
Insert tile spacers between each glass tile to maintain consistent gaps. These small plastic pieces keep your grout lines even and professional-looking. Without spacers, your tiles may shift and create uneven spaces.
Spacers are especially important with glass tiles because uneven grout lines are very noticeable. Think about how you want your grout lines to look—thin and subtle or wider for a bold effect? Choose spacers accordingly.
Cutting Tiles To Fit Edges
Edges and corners rarely fit full-sized tiles perfectly. Use a wet saw with a diamond blade designed for glass to cut tiles to the right size. Measure carefully before cutting to avoid mistakes.
Cutting glass tiles can be intimidating, but patience is key. I found that scoring tiles slowly and steadily reduces chips and cracks. Have you prepared a safe workspace for cutting to avoid accidents?

Credit: craftedworkshop.com
Grouting The Tiles
Grouting is a crucial step in installing glass wall tiles in your kitchen. It not only fills the gaps between tiles but also enhances the overall look and durability of your backsplash. Handling grout properly ensures your tiles stay beautiful and protected for years.
Selecting Grout Color
The grout color can change the entire appearance of your kitchen backsplash. Choose a color that complements your glass tiles—whether you want the grout to blend in or create a striking contrast.
Think about the style you want. Do you prefer a seamless look with matching grout or a bold grid effect with darker grout? Testing a small patch first can save you from regret later.
Applying Grout Carefully
Use a rubber float to spread grout evenly across the tiles, pressing it firmly into the gaps. Hold the float at a 45-degree angle and work diagonally to avoid pulling grout out of the joints.
Take your time. Rushing can cause uneven filling or air pockets. If you notice any gaps after the first pass, apply more grout to ensure full coverage.
Cleaning Excess Grout
After applying grout, wait about 10 to 15 minutes, then wipe off the excess with a damp sponge. Use gentle circular motions to avoid pulling grout out of the joints.
Rinse your sponge frequently to keep it clean. It’s better to clean multiple times than to let grout harden on the glass tiles, which can be difficult to remove later.
Sealing The Grout
Once your grout has fully cured—usually after 48 to 72 hours—apply a grout sealer to protect it from stains and moisture. This step is especially important in kitchens where spills are common.
Use a small brush or applicator bottle to cover the grout lines evenly. Sealing extends the life of your backsplash and keeps it looking fresh with minimal upkeep.
Finishing Touches
Finishing touches bring your glass wall tile project to life. They ensure a clean, polished look that highlights your kitchen’s style. Taking time with these final steps enhances durability and beauty. Each detail matters for a flawless finish.
Removing Spacers
Spacers keep tiles evenly spaced during installation. After the adhesive dries, gently pull them out. Use pliers if spacers are stuck but be careful not to damage tiles. Removing spacers reveals clean, even grout lines ready for filling.
Cleaning Tiles For Shine
Cleaning removes dust, adhesive, and grout haze. Use a soft cloth with warm water and mild soap. Avoid harsh chemicals that can dull glass tiles. Dry tiles with a lint-free cloth to prevent streaks. This step makes the tiles sparkle and stand out.
Inspecting For Imperfections
Look closely at each tile and grout line. Check for chips, cracks, or uneven grout. Fix small issues with tile adhesive or grout touch-up. Make sure all tiles are flush and secure. A thorough inspection guarantees a neat, professional look.

Credit: thediynuts.com
Maintenance Tips
Maintaining glass wall tiles in your kitchen keeps them bright and fresh. Proper care extends their beauty and lifespan. Follow simple steps to protect your tiles from dirt and damage.
Regular Cleaning Methods
Use a soft cloth or sponge for daily cleaning. Warm water and mild soap work well to remove grease and stains. Avoid harsh chemicals that can dull the glass surface. Wipe tiles dry to prevent water spots and streaks. For tough spots, a mixture of vinegar and water cleans effectively without damage.
Avoiding Damage
Do not use abrasive scrubbers or steel wool on tiles. Avoid dropping heavy objects that can chip the glass. Keep sharp utensils away from the tiled area. Use cutting boards and mats to protect nearby surfaces. Ensure grout stays sealed to prevent moisture damage behind tiles.
Repairing Chips And Cracks
Small chips can be fixed with clear epoxy resin. Clean the damaged area before applying the resin. Smooth the surface gently after it dries. For larger cracks, consult a professional for tile replacement. Address damage quickly to avoid spreading and costly repairs.
Frequently Asked Questions
What Tools Do I Need To Install Glass Wall Tile?
You need a tile cutter, notched trowel, adhesive, spacers, grout, sponge, and a level. Safety gear is also recommended.
How Do I Prepare The Kitchen Wall For Glass Tiles?
Clean the wall thoroughly and ensure it is smooth and dry. Remove any old paint or wallpaper before tiling.
What Adhesive Is Best For Glass Wall Tiles?
Use a high-quality, white, latex-modified thin-set mortar. It provides strong adhesion and prevents discoloration.
How Long Should I Wait Before Grouting Glass Tiles?
Wait 24 hours after installing tiles before grouting. This allows the adhesive to fully cure for a secure bond.
Conclusion
Installing glass wall tile in your kitchen can brighten the space quickly. Follow each step carefully for a smooth process. Take your time to measure and cut the tiles right. Use the right adhesive to keep tiles secure and lasting.
Clean tiles after installation for a shiny, neat look. Enjoy your new kitchen wall that looks fresh and modern. This small change can make a big difference in your home. Ready to start? Your kitchen upgrade awaits!

